You will need:
Sharpie Markers - Light Green, Dark Green, Teal/Aqua, and Black
Eyeliner Pencils (NOT liquid) - White and Black (and possibly a sharpener, if you're like me and bought the cheap pencils that aren't fancy and automatic)
About an hour and a half - possibly more, depending on the amount of coverage you're doing
A good sense of humor and the ability to laugh at yourself
Notes before you begin:
This tutorial is designed for people with fair skin – I’ve only done it on myself, so I really don’t know how it would work on anything darker than my pasty whiteness. ;)
This is done almost entirely with permanent markers – I don’t honestly know how safe this is, I use them because I’m allergic to everything under the sun, and these don’t cause me to break out.
Do not wash your face first – the natural oils of your skin will help to protect it from the markers, and assist with blending as you progress.
The colors of Sharpie and Bic brand permanent markers come off pretty easily with dish soap. I have had different results using different colors, brands, and areas of the body.
I put in contacts first – there’s no way I would have gotten them in afterward without smearing everything all over.
Once everything is washed off, you'll look like you have blackheads because the ink seeps into your pores while you're wearing it. Give it a few hours and wash your face again - you'll be good to go.
Step One:
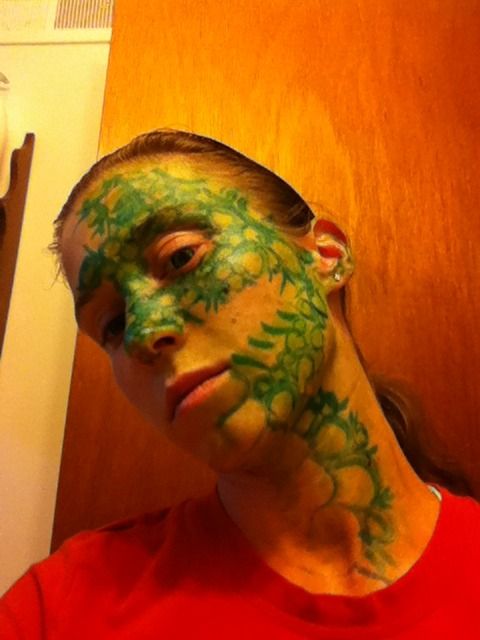
You’ll have to excuse me, I forgot to take a photograph of just the dark green outlines. Do them! Using your dark green marker, place your ovals and half ovals where you are going to want your scales. Take a look at a couple different types of lizard, and use those as a basic reference. The lines don’t have to be sharp or clean, and throughout the entire process remember that we are not drawing scales – we are drawing the /appearance/ of scales. Important distinction. ;)
You can see here that I’ve started to lightly block out some shapes on my ear, and that my dark green lines basically stop at the edge of my hair line. This will change later, but right now, it’s not important, we’re just laying the foundation for later.
Using my lightest green, I then went over all of the scaled area and filled it in, continuing in some places past the scales – this is going to be the groundwork for later. I varied the intensity of the light green in some areas, keeping in mind the areas that I’d like to be a little bit lighter at the end. Nothing needs to be clean or defined at this point, just have a good time getting used to scribbling on yourself and noticing the way the marker is working on your skin.
Step Two:
Pull out that teal color, and go outline all those dark
green circles. Remember to make a couple
slashy lines along your cheek- that’s where your ‘teeth’ will be. Thick lines will be fine – we’re starting to
create some depth here. This is usually
about the time where I start to go, “Ahhhh!!! I’m messing it up!!! This looks
TERRIBLE!” Don’t worry! Everything will
be okay! I also start to make some
diagonal lines out from some of the joining areas of the scales into the rest
of the skin, and going over any areas that I feel like I missed with that light green marker – it just looks better to me.
This is all up to you and your tastes, and the effects that you want to
create with it. I also start to block a
little further into the ear, but not much – don’t worry about the way that area
looks at all. You’re mostly going to
just color it over anyway.
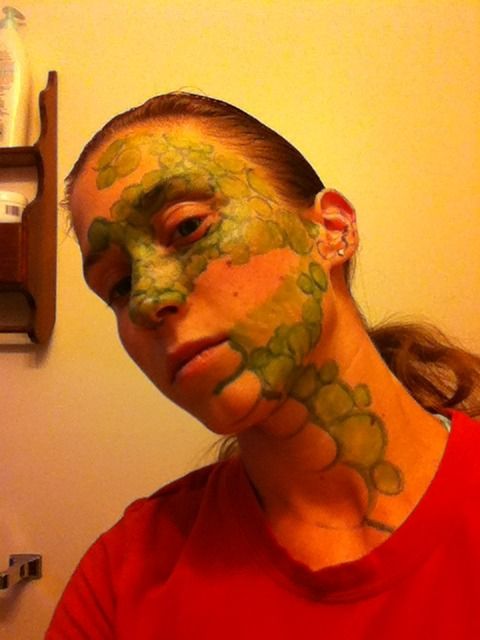
Step Three:
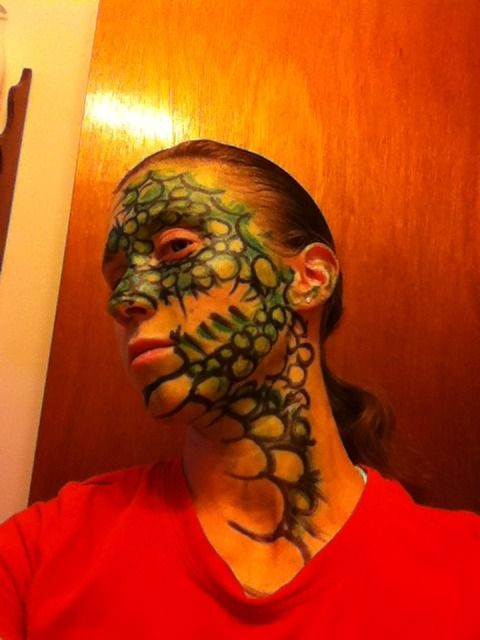
Whip out that black marker! Are you tired of drawing circles
yet? You’ll love with this part then! Go
ahead and outline all those ovals again.
Isn’t this fun?! I’ve also begun to really darken up those areas between
the scales – all those little places where I’m noticing the skin tone to be
glaringly obvious – this is where I take care of that. I also make sure to accent those teal slashy
lines – not directly over them, but to the side of them, overlapping. Feeling better now? You’ll start to look a bit more reptilian at
this point, take a few deep breaths – you’re doing awesome!
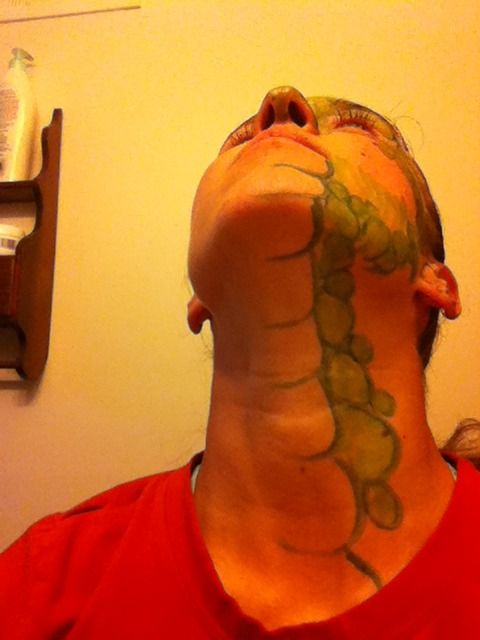
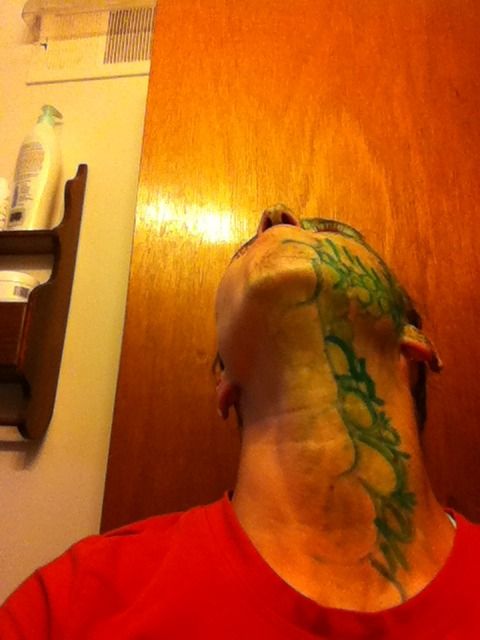
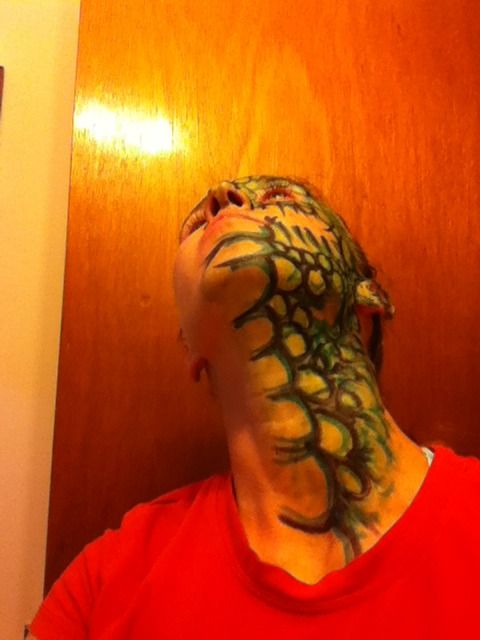
You can see that I’ve also decided I want to go a little further back on my neck – I lay down some black lines where I think I want to put those scales, and since they’re going to be less prominent anyway, I can just color them over and then shade with turquoise and dark green.
You can see that I’ve also decided I want to go a little further back on my neck – I lay down some black lines where I think I want to put those scales, and since they’re going to be less prominent anyway, I can just color them over and then shade with turquoise and dark green.
Step Four:
I pull out that teal marker again, and add some darker areas
where I feel like the lines are too sharp – this is really easy, just trace
inside the black. Gives it a little
depth, and softens it up a little bit. If
I see too much natural skin color, no problem, touch it up with my super light
green. I’ve also started to color my
ear. Scribble, scribble, scribble,
scribble, yeah!
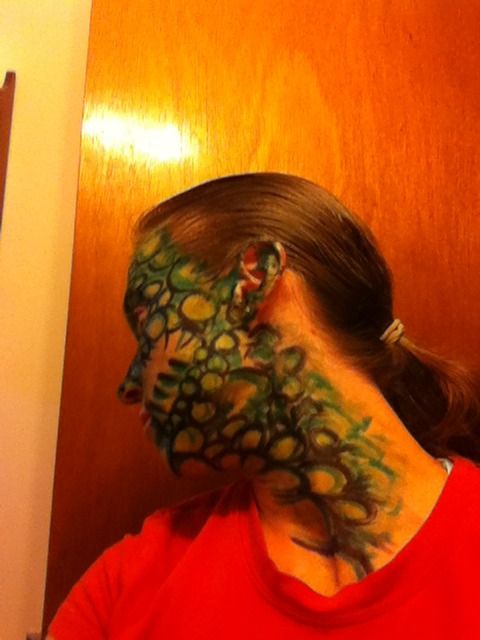
Step Five:
I use my teal and dark green to really fill in the color
back into my hair line, as well as finishing up the base coat on my ear. I touch up the sides of my neck, skipping the
black where I want it to start to blend (remember those little diagonal
lines out from the joining areas of the ovals!), and basically make sure my
colors are in where I want them.
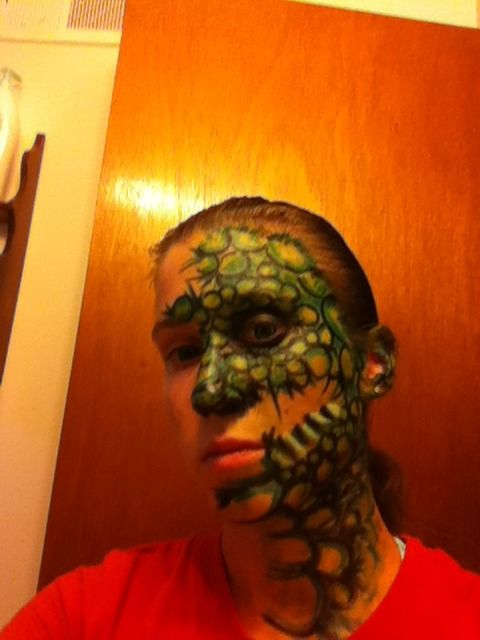
Step Six:
This is where we separate the lizards from the loozards (Get
it? Loozard? Like ‘loser’? It’s okay, you can groan.) Take that black eyeliner pencil, and fill in
the area around your eye. Get as close
as you can to the edge of your eyelid – remember, reptile eyes are a little more dramatic around the edges
than mammals, so you’re going to get it as crisp as you can. You’re also going to want to blacken the area
around the undersides of your nostrils, otherwise the fleshy color is going to
throw off the rest of the look. Use your
white eyeliner to make your ‘toothy’ slash lines.
Step Seven:
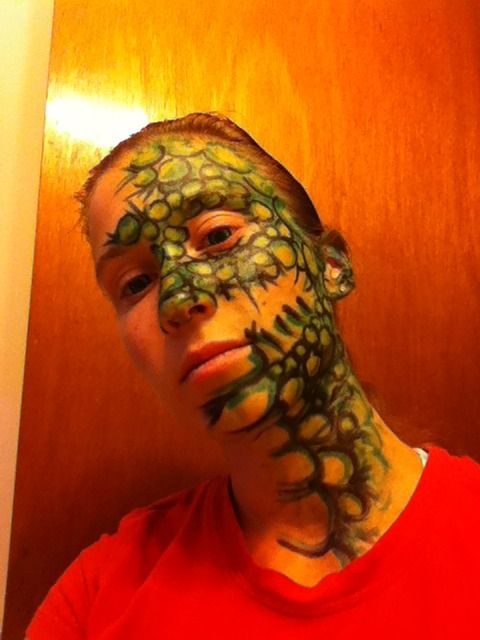
Highlighting. If
you’re anything like me, at this point you’re sweaty and your eyeliner pencils
have broken a million times and that stupid sharpener is useless and you’re
irritated at drawing these stupid ovals and- and- and- and- HANG IN THERE!!!
YOU’RE ALMOST DONE!!! Pick the direction
that you want the lighting to come from (aka, pick which side of the ovals you
want the white lines to be on). This can
vary a little bit, but should stay in roughly the same area for each oval. Around the inner edges of the ovals, take that white eyeliner
pencil and draw some semblance of half circles.
Toss a couple white lines on that ear for good measure – you are so pro.
Toss a couple white lines on that ear for good measure – you are so pro.
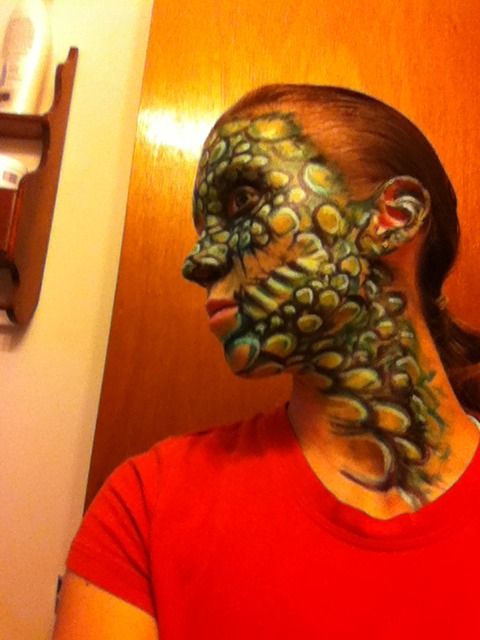

BOOM!
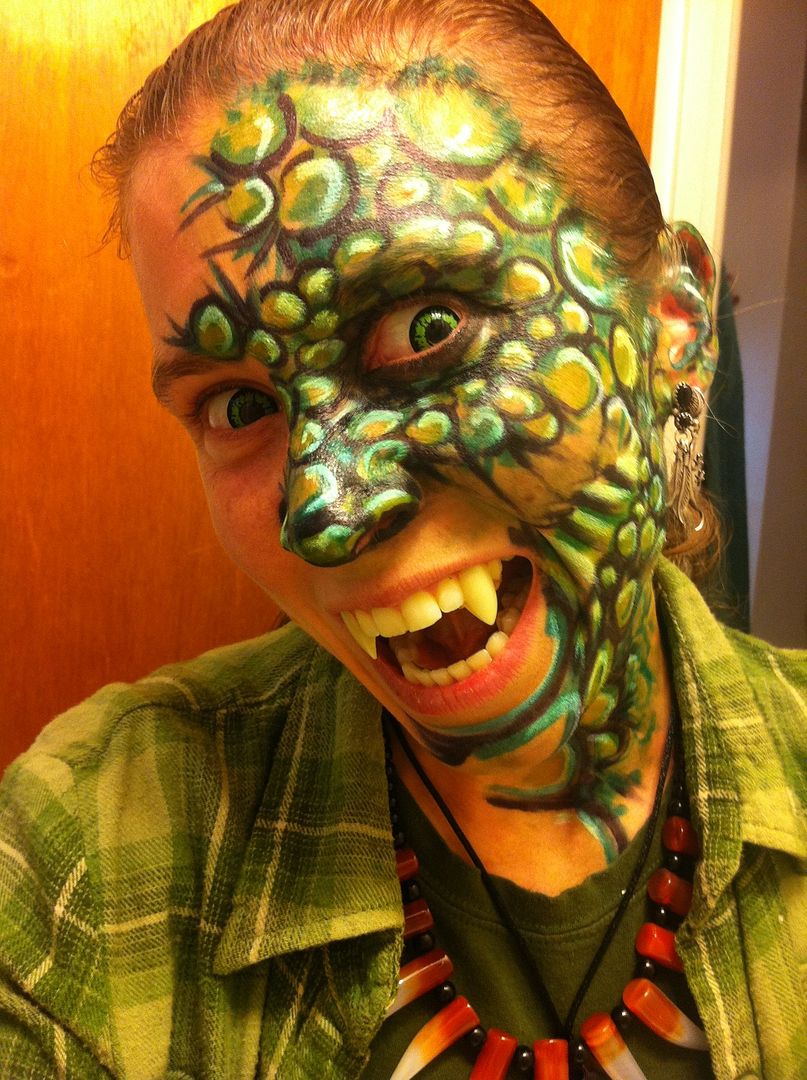
Get some decent lighting, and check out how amazing you
look! Ta-da!!! You did it! :D