Alright, while I've been waiting to get the animals moved in at my new place, I have admittedly been going a little stir crazy without them. One of the awesome things about reptiles, though, is the amount of awesome things you can do to decorate their tanks - something which, in my case, can be worked on without either the animals OR their enclosures (as long as you know the dimensions of the tank you're working with).
So, what better thing to do with my time than work on decorations?
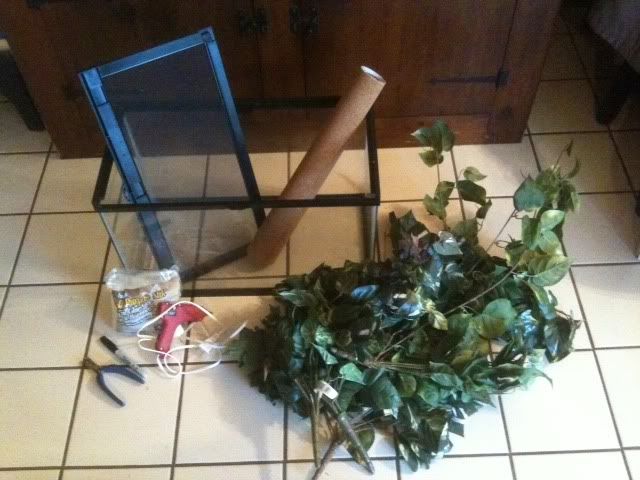
About a year ago, I started on a custom backdrop for my Crested Gecko breeder tank. Crested Geckos are an arboreal species, which live in semi-humid, moderate temperature environments - meaning that when I'm creating a background for these guys, I need something they can climb and hide in, which will stand up to a somewhat moist environment. To make one yourself, you will need:
1) Great Stuff Expanding Foam Insulation (I bought 2 cans of it, since I hadn't used the material before, and I wasn't sure how much I was going to need.)
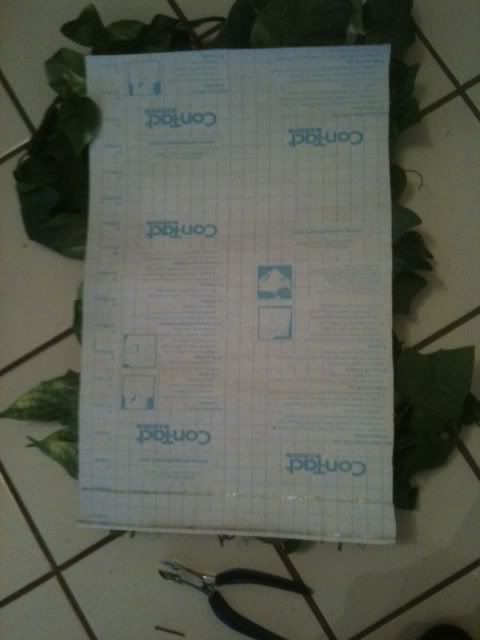
2) Something to act as the base for the background. I personally like to use flat sheets of cork board - it's reasonably inexpensive, lightweight, easy to manipulate so that I can get it the right size&position, and it seems to stand up well to my tanks&their inhabitants. Additionally, a lot of cork board packages come with some sort of self-adhesive Velcro pads, which you can use to mount the background to the tank if you deem it necessary (as with anything you put in your tank, be aware of the dangers of placing an adhesive in the enclosure - I prefer to make the background large enough that I can wedge it tightly against the back of the tank to prevent slippage, or small enough that I can use a suction cup based clip for easy removal.)
3) Wire Cutters or strong scissors
4) Hot glue gun (and extra sticks of hot glue)
5) Clear drying caulk
6) Dirt (I used loose coconut fiber that I had frozen for a week or two to 'sanitize' it, then defrosted)
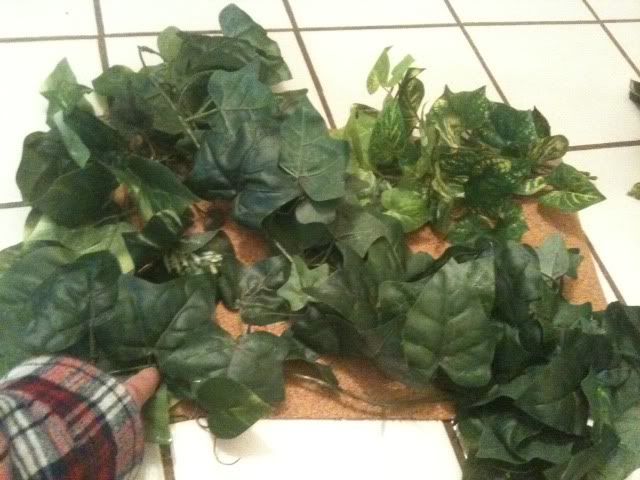
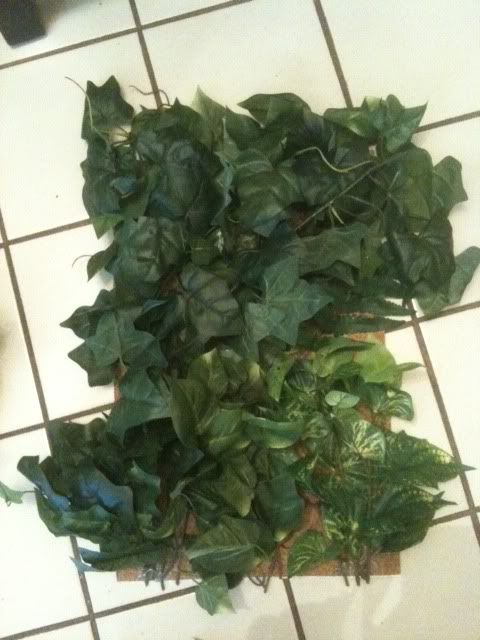
7) Fake Plants (I got mine from Michael's Arts&Crafts - it is important when selecting your plants that you make sure there are no sharp edges or little pieces that they could pull off&hurt themselves.)
8)
*OPTIONAL, STRONGLY SUGGESTED* Biodegradable planter cups
As I originally started this project nearly a year ago, I do not have photos of the first few steps - I know, I know - epic documenting fail. ;)
That's alright, you're intelligent people - I'm sure you can figure it out without the visual aids!
...Or, next time I make one of these, I'll photograph that as well.
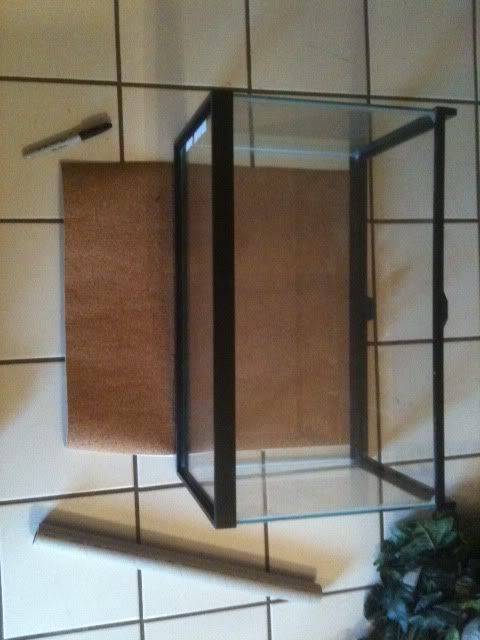
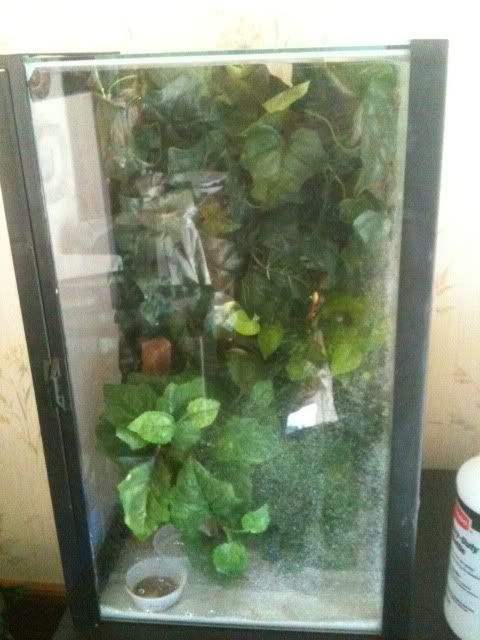
The breeder tank that I use for the Crested Geckos is an 18"x18"x24" - I started by arranging the cork board into an appropriate sized back drop (taking several 12"x12" pieces and cutting&hot gluing as appropriate to create an approximately 17"x17" square - allowing space on the edges for the Great Stuff Expanding Foam to... well... expand, after I sprayed it on... more on that in a moment).
After I had hot glued the pieces of cork board into an appropriately sized&shaped base to start with, I took some of those biodegradable planters and arranged them on top of the base (to create pockets for hiding/sticking the fake plants in later) - I ended up cutting the biodegradable planters in half to create a more natural look, then hot glued them in place as well.
Next step... GREAT STUFF! This was actually the most unusual (and simultaneously most nerve-wracking) step for me, since I had never used this particular medium before (it was recommended to me by numerous people who have done their own Crestie enclosures). I took the Great Stuff Expanding Foam, and commenced to cover the entire thing - I actually ended up overdoing it a little, I think - it sort of started swallowing those plant pockets I had created with the biodegradable planters - but it all worked out well.
I let the Great Stuff dry COMPLETELY, then picked up the Clear-Drying-Caulk and my bag-o-dirt.
...This step was SO messy. I ended up covered in caulk and coconut fiber. I really wish someone had managed to get a photo of me; I looked like a swamp thing.
Basically, I smeared the entire thing with clear drying caulk, and then covered it with the dirt.
...I had SO. MUCH. FUN! :D
The end result (after letting it dry completely, and shaking off the majority of the extra dirt... both from the background and from myself) left me with something like this:

Lumpy, brown, and reasonably unimpressive, albeit a pretty good start if I do say so myself. (You can't see them, particularly from this perspective, but there are four plant pockets hidden in there - their 'invisibility' isn't necessarily a bad thing; I prefer the look of not being able to see where they are - it feels more 'natural looking' to me; however you do yours is up to you. Have fun! Get creative!)
I then proceeded to let this air out for... oh... about a year (literally, since I sort of forgot about it). You don't need to let it air for that long, but I'd give it about a week in a well ventilated place to finish out-gassing. If you're not sure if it's done, give it more time - you definitely don't want those chemical smells in with your critters.
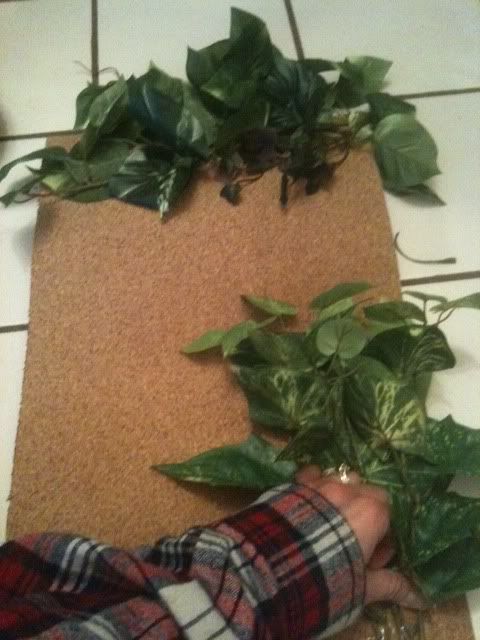
After it's completely done drying and is no longer giving off that chemical concoction aroma, it's time to DECORATE! Grab those plants, people!

Plug in your hot glue gun, and start playing around with where you think you want your plants to be. Once you like the way they look, get going! Begin to hot glue them in place.

*NOTE* A good deal of fake plants have wires in them that will help hold shape to some extent (this is where the wire cutters come in - trimming pieces off larger plants, etc), and it's important to remember that your critters will actually be actively involved with this background. While the support of the wire is nice, there's nothing quite like spending a ton of time putting a tank together, only to walk in the next morning and find that your geckos (party animals that they are) destroyed it over night. I make sure to 'anchor' the plants with hot glue in several locations, to prevent slippage, offer more stable footing to the animals, and stop the animals from massacring the decorations that they're clambering over.
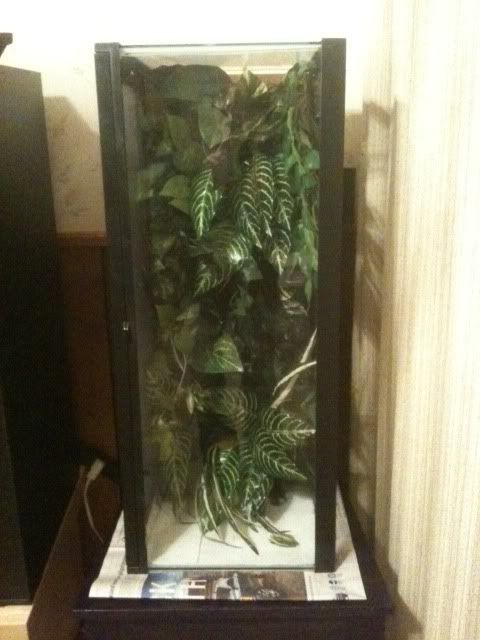
When you're done (or have had enough of burning yourself on the hot glue), let it set to dry, and VOILA! You should be left with something vaguely resembling a naturalistic environment, that you can attach/wedge in to the back of your tank.

Personally, I have a blast with this stuff. Don't be afraid to get creative, have fun, and don't be afraid to make
mistakes a mess ;) - it's how we learn.
Go enjoy your animals.