Thursday, April 7, 2011

I Get Lizards In The Mail

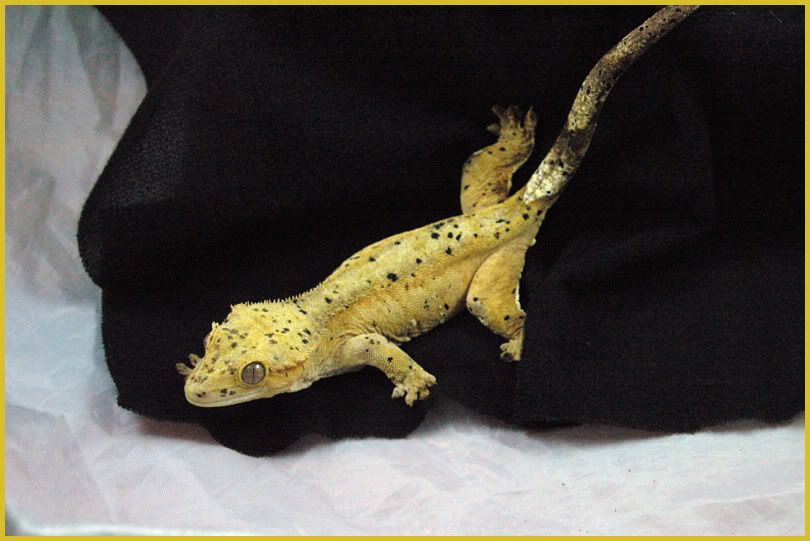
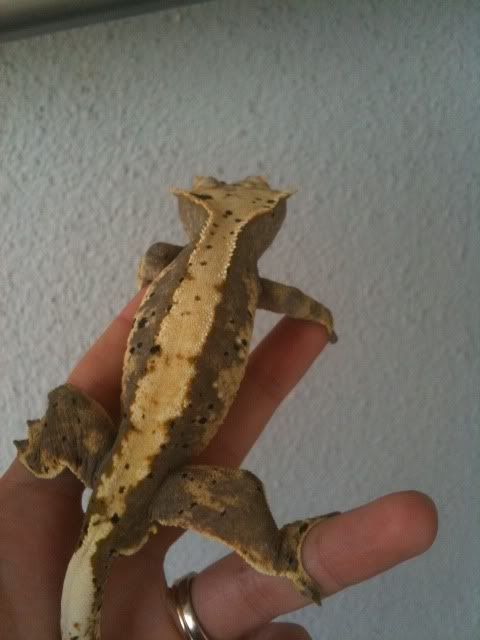
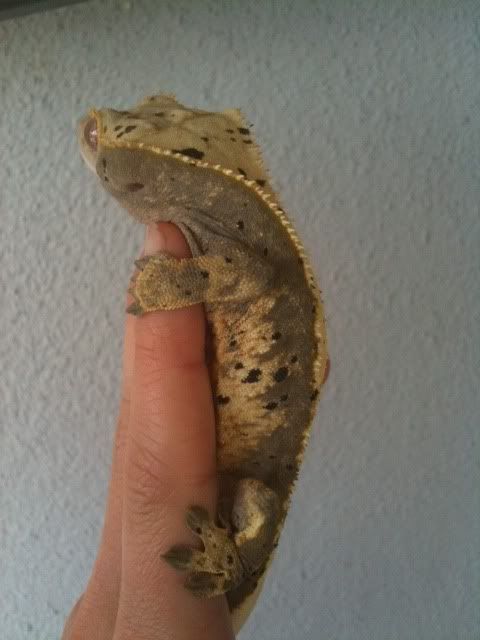
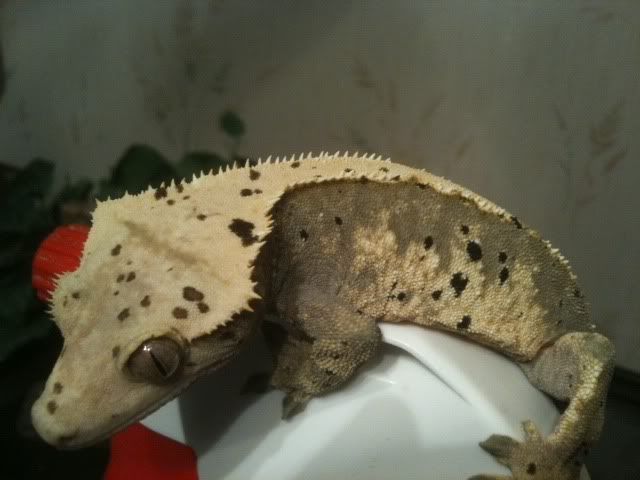
Norbert's new girlfriend has arrived.

The husband stayed in on Tuesday morning in order to sign off on the package. <3

Without further ado, meet Finch.


Saturday, March 26, 2011

DIY - Naturalistic Background, No 'Great Stuff' Needed!

I'd be amazed if no one had thought of this before, but I personally haven't seen any threads about it, so here you go! They're quick, easy, and don't require the curing time or mess that great stuff and silicon do.

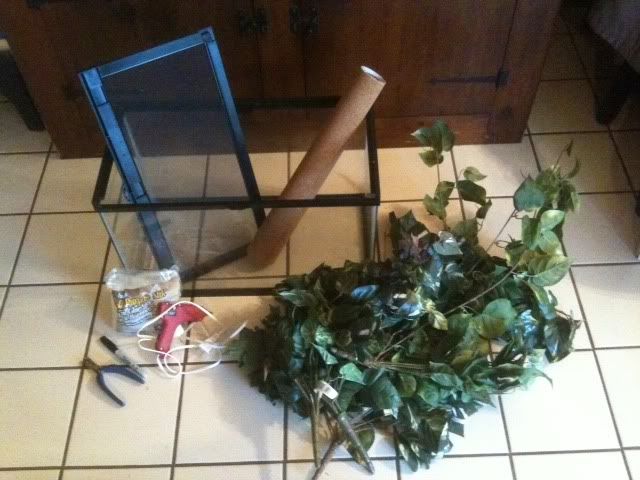
You will need:
-Your tank
-A pen of sorts for marking (I had a sharpie lying around so I used that)
-Strong scissors/wire cutters
-Hot glue gun&extra glue sticks
-Fake plants (I got mine from Michael's Arts&Crafts - it is important when selecting your plants that you make sure there are no sharp edges or little pieces that they could pull off&hurt themselves.)
-Contact Paper Cork Board (You can find several different brands, available in different places - I don't remember where I got mine, it might have been Orchard Supply Hardware. Here's a link to some that they have on amazon.com: http://www.amazon.com/Tact-04F-C6421-06-18-Inch-4-Feet-Adhesive/dp/B000WEPD6U/ref=sr_1_2?ie=UTF8&s=home-garden&qid=1301162045&sr=8-2
-Optional, Strongly Suggested: A good sense of humor

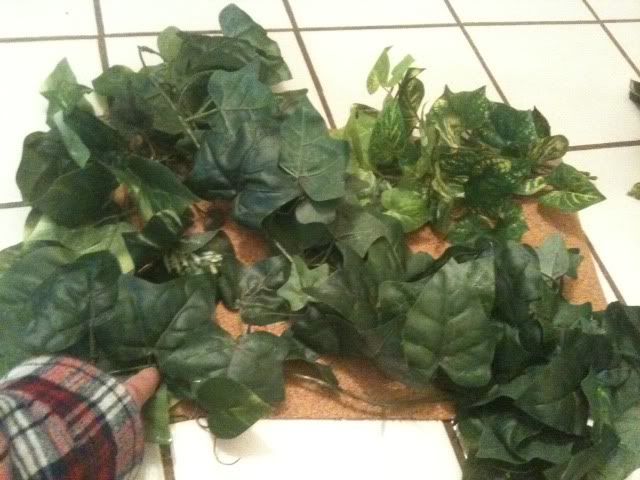
All the supplies, put together (oooh... ahhh... a visual aid...):


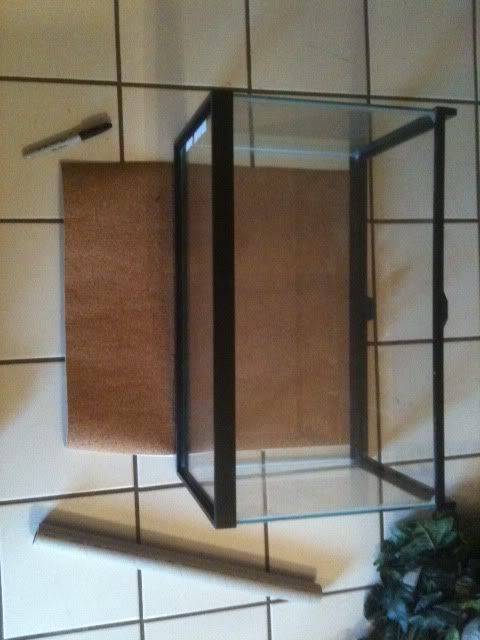
Pick the side that you want to decorate, and measure it out on the cork board. I'm working with scraps that I had left over, and managed to have just enough to cover that back wall of a 10 gal that I wanted to decorate. Draw your lines, then cut.

Personal recommendation: I like to cut the cork a little bit smaller than the dimensions of the side I'm putting it on, so that I know it will fit, and it gives me a little leeway with the plants and letting them stick over the edges. (For example, if the side was 18x24, I might cut the cork at 16x22)

Measure, draw, cut:


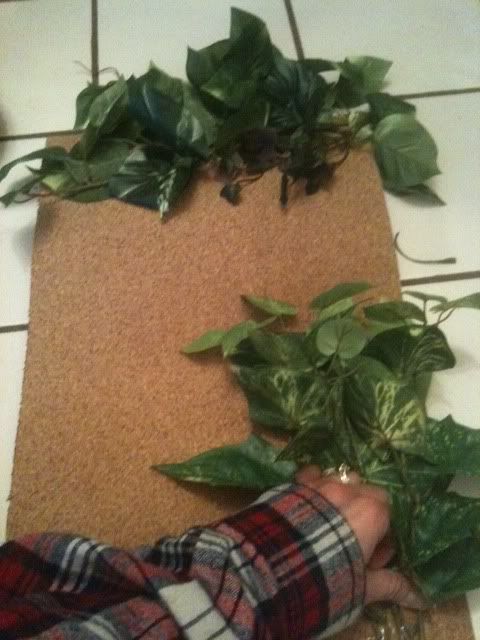
Plug in that hot glue gun, grab your fake plants, and start decorating!


A couple 'rule of thumbs' that I like to keep in mind:

-With my geckos, "If it's not nailed down, they're going to tear it up." My critters /love/ these backgrounds, and it shows.

-Fabric is easier to glue than plastic. I always make sure to anchor the plants down by the 'stem', and then additionally by gluing a couple of the leaves to the cork as well.

-When in doubt, add more glue. It doesn't always have to be to the cork board - sometimes I'll glue one leaf to another well anchored leaf.

I like to rotate it a little, make sure I get a different view as I'm gluing stuff down, and 'over fill' the background a little - that's my own personal preference.


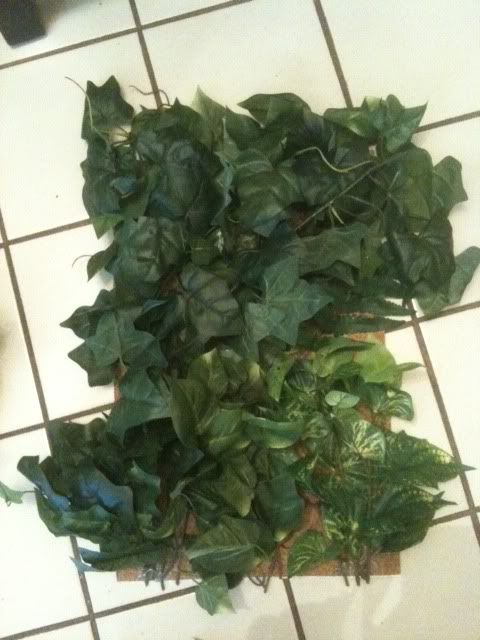
When I think the background looks full enough, or I'm done burning my fingers on the glue gun (which, for a ten gallon, takes about an hour), it looks something like this:


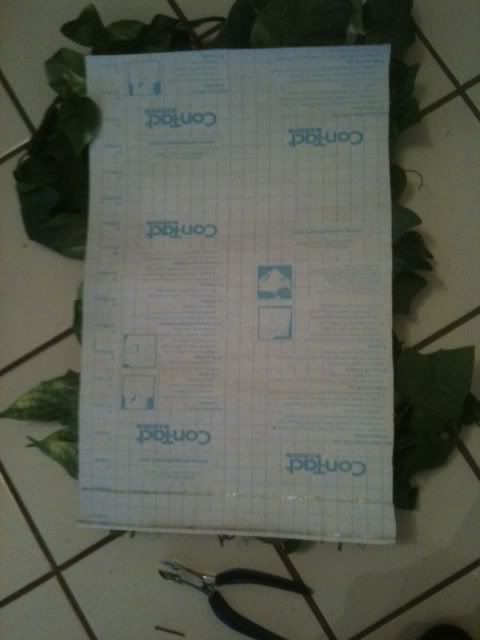
Turn it over, peel off the paper...


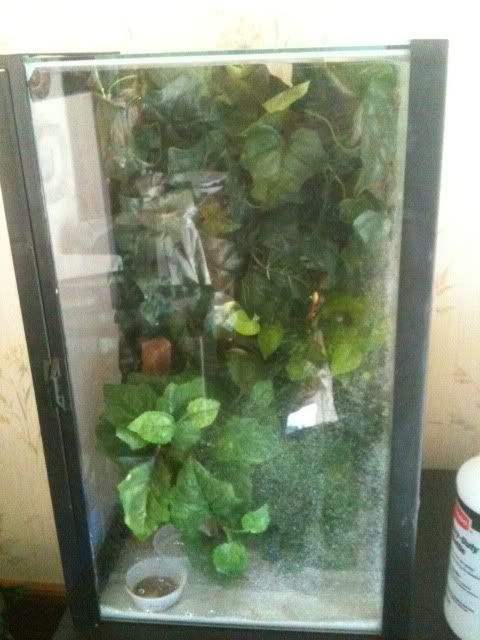
And press it onto the inside of the tank. Make sure to be very thorough, so that it adheres fully - I like to start from the center and work out, which helps to eliminate any air bubbles that might have gotten caught between the paper and the backing.


They're quick, easy, and hold up well to both the geckos and the humidity.

Hope this is helpful! :D

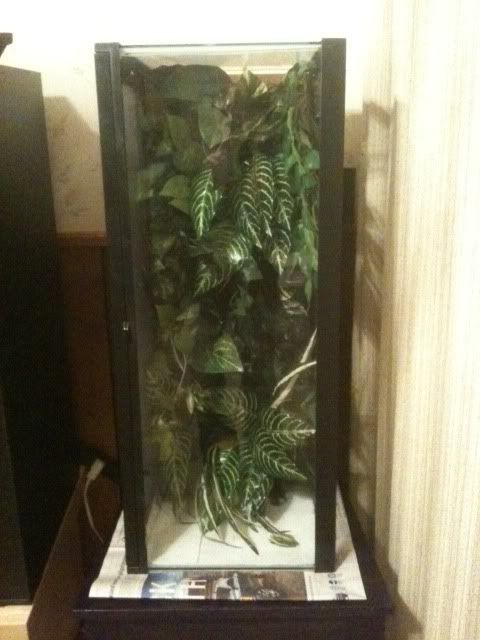
A gratuitous shot of the 20 L I did about 4 months ago:

Thursday, March 24, 2011

Seeing Spots

Well, tonight marks the 'official' retiring of my first breeding trio. (This may be retracted at a later date, but for now, it stands.)

Emerson, Zippo, and Honey will most likely live out the rest of their lives as 'pet only' ladies, luxuriating in restful days of lapping up Crested Gecko Diet, hanging from the glass walls of the tanks, and never having to look at a male again.

That said, I do plan on continuing to breed Cresties, at least for another year. I redid the reptile wall this evening; set a 20 Gallon Long on its end, creating a new home for one of my male Crested Geckos, Norbert (more on this tank and its backing later), and removed Lillun (the male that was in with the girls for the past few seasons) so that he now has his own enclosure.

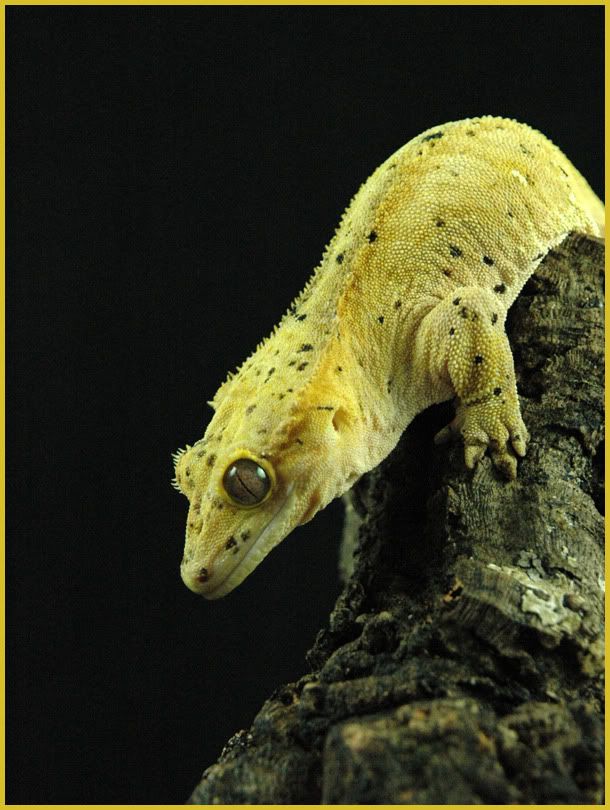
Norbert is what they call a Super Dalmation color morph, meaning that he has over 100 spots on his body.


Earlier this week, I purchased a girlfriend for him - another Super Dalmation - and she can be seen here:

http://www.crownjewelreptiles.com/animals/view/26#

They should produce some very, very spotty babies, with some great crest structure and body size.

The offspring of Dalmation morph geckos tend to reflect the parents, and then some - being that both mom and dad have 100+ spots, the babies should definitely be some lookers.

I can hardly wait. :D

Saturday, March 19, 2011

Hatching Them Is The Easy Part

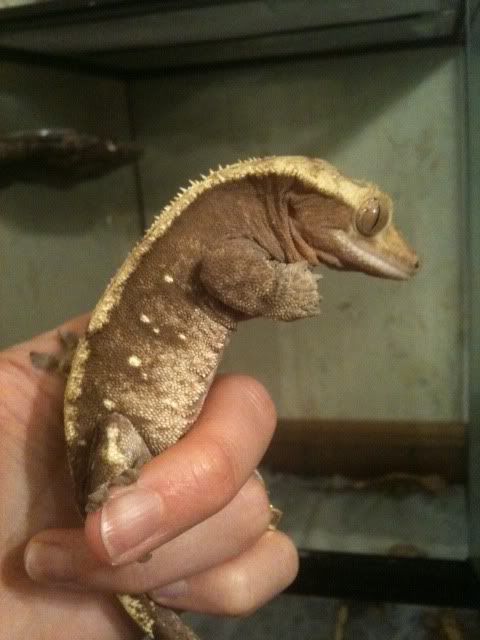
Those of you that know me, know that I breed Crested Geckos. For those of you that don't know what those are, imagine a tiny, wingless, toothless dragon, whose temperament ranges somewhere between lap dog and apathetic house cat. Or, for those with a less creative imagination, look below:


When I entered into breeding these geckos a few years ago, my animals were competitive level breeders - their coloration and structure was worth noting and reproducing. It has now been a few years since I purchased these geckos; by today's standards, they generally have one quality worth reproducing (some have great patterning, some have awesome crest structure), but are no longer top of the line. Being that I have not invested in new geckos, the animals I'm producing are generally very high level pet quality, and in about 20% of them, breeding quality. For this very reason, this will likely be the last year that I use these geckos as breeders - I'm alright with producing pet quality (someone's got to cater to those who are really just looking for an awesome pet lizard), and keeping those that I don't sell off, and at the same time, I don't want to 'flood the market' with them. It's sort of like dogs - everyone wants something different, but you don't want too many of any one kind out there or people are going to start mistreating them.

If you're looking to get into breeding reptiles, it is important to consider why you want to do this. Is it to make oodles of money? I'll tell ya - breeding reptiles for the cash and prizes is like chewing bubble gum to win an algebra contest (minus the sore jaw). Are you breeding toward a particular goal? If so, are you willing to continue investing in purchasing breeding stock to keep pace with the evolution of the traits that you're shooting for? What are you going to do with the babies that don't fit into your breeding project? Reptiles need food, and space, and decorations, and care just like any other pet - only, they can be a lot harder to get off of your hands and into a new home. (I don't understand why, really - scaly babies are just as adorable as a teeny tiny fluffy bunny...) Are you breeding them just to see if you can do it? To hatch and raise your own babies?

My next project is going to be my Ball Python line. Back in 2008, I purchased two Lesser Platinum Ball Pythons - one male, one female - and I've spent the past few years growing them up into something of breeding age and weight. I bought these two with a particular goal in mind: I want to produce, hatch, and raise my own Blue Eyed Leucistic Ball Python. I may produce several clutches of Lesser Platinums before this occurs, and all of them will be breeding quality, because they are being bred for their coloration genes (Lesser Platinum is a color morph of a standard Ball Python) rather than a combination of traits (Crested Gecko breeding quality is based on the individual displaying a large collection of different visible traits).

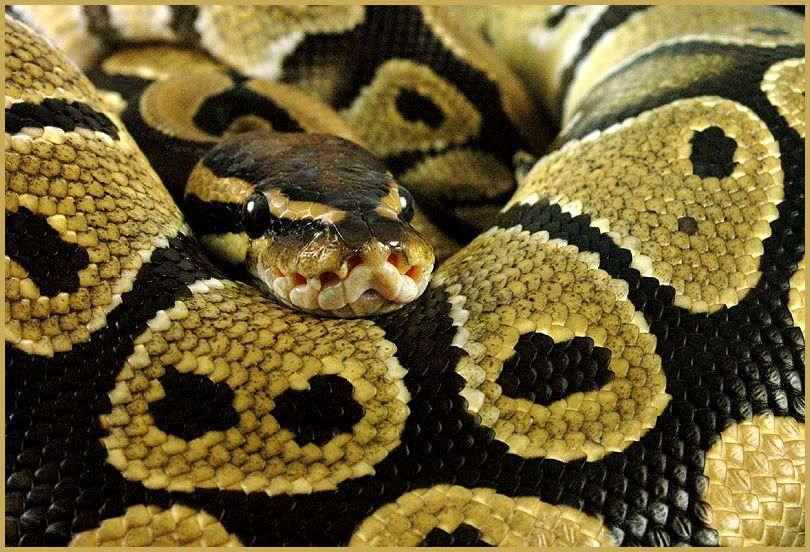
Normal Ball Python (my pet-only sweetheart, Loki):


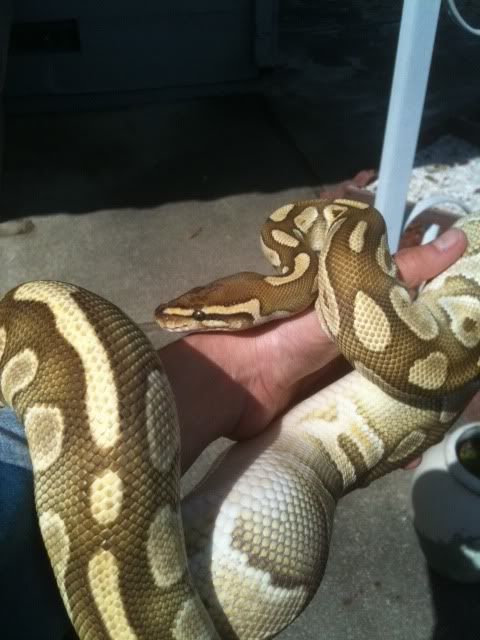
Lesser Platinum Ball Python (my female, Leyla):


Breeding reptiles is a constantly evolving (no pun intended) practice - it saves you a lot of time, energy, and money if you really do your research beforehand. It all comes down to responsibility, really. Get some background on the species that you want to breed, know /why/ you want to breed them, what sorts of projects other people are doing with the same species, have a plan for what you're going to do with the 'extra' babies, and - if push should come to shove - know that you need to be prepared to take care of every animal you produce.

Tuesday, October 19, 2010

DIY - Naturalistic Crested Gecko Background/Hide Spots

Alright, while I've been waiting to get the animals moved in at my new place, I have admittedly been going a little stir crazy without them. One of the awesome things about reptiles, though, is the amount of awesome things you can do to decorate their tanks - something which, in my case, can be worked on without either the animals OR their enclosures (as long as you know the dimensions of the tank you're working with).

So, what better thing to do with my time than work on decorations?

About a year ago, I started on a custom backdrop for my Crested Gecko breeder tank. Crested Geckos are an arboreal species, which live in semi-humid, moderate temperature environments - meaning that when I'm creating a background for these guys, I need something they can climb and hide in, which will stand up to a somewhat moist environment. To make one yourself, you will need:

1) Great Stuff Expanding Foam Insulation (I bought 2 cans of it, since I hadn't used the material before, and I wasn't sure how much I was going to need.)
2) Something to act as the base for the background. I personally like to use flat sheets of cork board - it's reasonably inexpensive, lightweight, easy to manipulate so that I can get it the right size&position, and it seems to stand up well to my tanks&their inhabitants. Additionally, a lot of cork board packages come with some sort of self-adhesive Velcro pads, which you can use to mount the background to the tank if you deem it necessary (as with anything you put in your tank, be aware of the dangers of placing an adhesive in the enclosure - I prefer to make the background large enough that I can wedge it tightly against the back of the tank to prevent slippage, or small enough that I can use a suction cup based clip for easy removal.)
3) Wire Cutters or strong scissors
4) Hot glue gun (and extra sticks of hot glue)
5) Clear drying caulk
6) Dirt (I used loose coconut fiber that I had frozen for a week or two to 'sanitize' it, then defrosted)
7) Fake Plants (I got mine from Michael's Arts&Crafts - it is important when selecting your plants that you make sure there are no sharp edges or little pieces that they could pull off&hurt themselves.)
8) *OPTIONAL, STRONGLY SUGGESTED* Biodegradable planter cups

As I originally started this project nearly a year ago, I do not have photos of the first few steps - I know, I know - epic documenting fail. ;)

That's alright, you're intelligent people - I'm sure you can figure it out without the visual aids!

...Or, next time I make one of these, I'll photograph that as well.

The breeder tank that I use for the Crested Geckos is an 18"x18"x24" - I started by arranging the cork board into an appropriate sized back drop (taking several 12"x12" pieces and cutting&hot gluing as appropriate to create an approximately 17"x17" square - allowing space on the edges for the Great Stuff Expanding Foam to... well... expand, after I sprayed it on... more on that in a moment).

After I had hot glued the pieces of cork board into an appropriately sized&shaped base to start with, I took some of those biodegradable planters and arranged them on top of the base (to create pockets for hiding/sticking the fake plants in later) - I ended up cutting the biodegradable planters in half to create a more natural look, then hot glued them in place as well.

Next step... GREAT STUFF! This was actually the most unusual (and simultaneously most nerve-wracking) step for me, since I had never used this particular medium before (it was recommended to me by numerous people who have done their own Crestie enclosures). I took the Great Stuff Expanding Foam, and commenced to cover the entire thing - I actually ended up overdoing it a little, I think - it sort of started swallowing those plant pockets I had created with the biodegradable planters - but it all worked out well.

I let the Great Stuff dry COMPLETELY, then picked up the Clear-Drying-Caulk and my bag-o-dirt.

...This step was SO messy. I ended up covered in caulk and coconut fiber. I really wish someone had managed to get a photo of me; I looked like a swamp thing.

Basically, I smeared the entire thing with clear drying caulk, and then covered it with the dirt.

...I had SO. MUCH. FUN! :D

The end result (after letting it dry completely, and shaking off the majority of the extra dirt... both from the background and from myself) left me with something like this:


Lumpy, brown, and reasonably unimpressive, albeit a pretty good start if I do say so myself. (You can't see them, particularly from this perspective, but there are four plant pockets hidden in there - their 'invisibility' isn't necessarily a bad thing; I prefer the look of not being able to see where they are - it feels more 'natural looking' to me; however you do yours is up to you. Have fun! Get creative!)

I then proceeded to let this air out for... oh... about a year (literally, since I sort of forgot about it). You don't need to let it air for that long, but I'd give it about a week in a well ventilated place to finish out-gassing. If you're not sure if it's done, give it more time - you definitely don't want those chemical smells in with your critters.

After it's completely done drying and is no longer giving off that chemical concoction aroma, it's time to DECORATE! Grab those plants, people!


Plug in your hot glue gun, and start playing around with where you think you want your plants to be. Once you like the way they look, get going! Begin to hot glue them in place.


*NOTE* A good deal of fake plants have wires in them that will help hold shape to some extent (this is where the wire cutters come in - trimming pieces off larger plants, etc), and it's important to remember that your critters will actually be actively involved with this background. While the support of the wire is nice, there's nothing quite like spending a ton of time putting a tank together, only to walk in the next morning and find that your geckos (party animals that they are) destroyed it over night. I make sure to 'anchor' the plants with hot glue in several locations, to prevent slippage, offer more stable footing to the animals, and stop the animals from massacring the decorations that they're clambering over.

When you're done (or have had enough of burning yourself on the hot glue), let it set to dry, and VOILA! You should be left with something vaguely resembling a naturalistic environment, that you can attach/wedge in to the back of your tank.


Personally, I have a blast with this stuff. Don't be afraid to get creative, have fun, and don't be afraid to make mistakes a mess ;) - it's how we learn.

Go enjoy your animals.
Monday, October 18, 2010

Have Reptiles, Will Stay Home

Hey guys - sorry about the absence; I've been a little busy getting married. ;)

I am now on my ninth day sans scaly babies, and I've got to admit - it feels a little weird. I couldn't figure out why it felt so awkward until I realized that the last actual vacation I took was in June of 2007, over three years ago.

Appropriate pet-sitting is tough to find, even when the animals are as common as dogs or cats; when you have anywhere between 10 and 40 reptiles for people to look after, each with their own particular diet/temperature/humidity/handle-ability requirements... it gets more complicated, not to mention more expensive.

Somehow, for my honeymoon, my mom stepped in with her natural good grace and offered to keep an eye on the critters for me until I get back into the swing of normal daily life.

Those tanks I ordered back in July should arrive some time within the next month and a half or so; I am SUPER stoked, and there will definitely be photos of those when they get here, and once their set up. I'm also going to be working on some decorations for the largest Crested Gecko tank this evening I think - after I move them over, I'm going to be reorganizing things, maybe converting it into a naturalistic set up.

More to come - for now though, over and out.

Friday, October 1, 2010

Every Once In A While, I Weird Myself Out

"Hey, so what kinds of things are you going to be writing about on your blog?"
"Oh, you know, some of the ridiculous things I do as a reptile keeper. Some of it'll be informational, sometimes photo posts, sometimes silly stories or really weird things I've done."
"I saw that little turtle picture, that's pretty cute."
"Haha, yeah, he was."
"Don't have him anymore?"
"Not... really... I have part of him. I kept the shell."
"...How do you get the shell off of a turtle?"

Let's start by establishing that this turtle was a rescue; someone bought their kid a 1" turtle from Chinatown, and - after finding out that not only are they a health hazard (especially for kids), but they're also illegal, it was abandoned at the store.

Me being me, I took it home.

I got him set up appropriately, took him outdoors to get his UV exposure, all that good stuff - and yet, unfortunately, never could get him to eat.

As seems to occur when unfortunate events stack up, our tiny turtle didn't make it for very long.

Which brings us back to, "...How do you get the shell off a turtle?"

(Weak of stomach, turn back now.)

The initial response was to take the body and place it outside, near a colony of ants; the ants then strip away everything but the bones, and you're left with a pretty awesome skeleton. The ants, however, have had a habit in the past of walking off with little pieces that I wanted; I wasn't willing to sacrifice to them this particular collection of bones.

Next option? Boil it.

I will save you the gory details, but rest assured, I will never be doing that again.

On the first count, it absolutely reeks. I don't think I've ever smelled anything so foul as a boiling turtle. Even in the only port-a-potty at the fair. In the middle of a marathon. On a hot day. In India.

On the second count, it's a turtle. That died for uncertain reasons. The health hazards of keeping a regular live turtle near things you eat with are high, never mind a dead one, when you don't know exactly what it was that killed it. The amount of scrubbing and disinfecting that ensued was pure ridiculousness.

So, being that I couldn't stand the smell long enough for the boiling process to be particularly effective, that left me final option.

Manual removal.

For those of you that don't know, turtles are attached to their shells; while it varies from species to species on how the shell is actually constructed and how much 'shell reduction' has gone on, we'll basically say that their spine is fused to the inside of the shell. (Poke around here for some more highly informative stuff regarding turtles, tortoises, and their shells: http://reptilis.net/2009/01/21/t-u-r-t-l-e-power-part-1-turtles-are-weird/)

Using some very unorthodox methods, will power, and stubborn 'I CAN DO THIS' concentration, I pried my turtle from his shell with...

An old fondue-fork-like-object.

And scissors.

...I apologize.

I justify it only with morbid curiosity, and the intense desire to have a tiny little turtle shell of my own.

...It did work. Sort of.

And that's some of the sort of thing you'll be reading about on this blog.