This journal entry was originally written on July 29th of 2010, while my reptiles and I were still residing in a single bedroom of my parents home. While the count of the animals fluctuates, and I now keep them outside of my bedroom, the sentiment remains the same. Enjoy!
--
Living in close quarters with animals will teach you nothing if not patience. As it currently stands (after a few unexpected losses, and downsizing for the move), I share my bedroom with three Ball Pythons, sixteen Crested Geckos, and one Leopard Gecko. One can only imagine what the room has looked like over the past sixteen years, constantly transforming to accommodate yet another tank when, just after adding the last one, I swore to myself that there was 'absolutely, positively, no more room.'
A light sleeper in general, I have (over time) become much more adept at continuing to snooze straight through the various bumps, thumps, rustles, clicks, chirps, thunks, and other assorted noises in the night. The one thing I have not adjusted to is... snake pee. (Henceforth referred to by its scientific name, 'urates'.)
Currently, my bed is lofted six feet into the air to allow myself some actual living storage space; all said and done, I use the area under my bed for supplies and clothing, and sleep roughly 18" from the ceiling. Sleeping quarters are cramped, with poor air circulation and heat issues - or, as I call it, "cozy".
It is not quite so 'cozy' at two o'clock in the morning, when I have suddenly come from REM sleep to full consciousness at lightning speed, only to discover that my sinuses and lungs are ON FIRE and I can barely breathe.
Between the nocturnal nature of the animals I keep, the natural out-gassing of waste products, and the very poor circulation of air around my head at night, I regularly find myself waking up in just such a manner. There's no polite way to say it - urates STINKS. It is, basically, a waste form of ammonia; ammonia, as you may or may not know, is the main ingredient in smelling salts. It has become no real surprise to the rest of my family to discover me up and scrubbing tanks in my boxer shorts at three a.m., or crashed on the futon in the living room for the night with my bedroom window open until the area becomes 'livable' again. (It also helps explain why all of the animals are in my room - it's tough to make an argument for having any part of the rest of the house smell like that. Maybe we could keep them in the bathroom?)
It also makes it obvious that the only people who keep animals like that are people that love them.
I have heard many people exclaim, "Oh, isn't it darling!" about a newborn baby - and maybe, to some, it is; wrinkly, purple, crying and screaming and smelling of sour-milk-y vomit... Adorable. For the most part, though, I think there's something about that statement that rings most true for the mother and father; the ones that have been up all night feeding it, changing its diapers, burping it, and singing it back to sleep as best as they can - the ones that changed their lives to have it in their homes.
That's how it is for me with my reptiles; where many people look at them and see a scaly representation of evil itself (which is sometimes how I view newborns, so I'll call it an even trade), I see my own version of a kid - the thing I've worked my life around to keep.
Saturday, September 3, 2011
Sunday, May 15, 2011
I sometimes indulge in shameless self promotion.
I've said it before, I'll say it again - the reptile industry isn't the one to get into if you're in it for the cash and prizes.
That said, it's a frickin' awesome hobby, especially during Spring!
If you don't know about my webpage yet, go ahead and check it out:
www.partygecko.com
You can also follow us on Facebook by going here:
http://www.facebook.com/partygecko#!/
That said, it's a frickin' awesome hobby, especially during Spring!
If you don't know about my webpage yet, go ahead and check it out:
www.partygecko.com
You can also follow us on Facebook by going here:
http://www.facebook.com/partygecko#!/
Monday, May 9, 2011


Saturday, April 23, 2011
DIY - Isolation/Hydration Station
Every once in a while, you're going to need to separate one of your animals from the others - whether it's a new arrival, an illness, an injury, aggression, etc. This can be done quickly and easily, for far less than the cost of setting up an entirely new tank. The DIY I'm showing here is designed for temporary use (generally for injury or hydration), since it's such a basic set-up, but it can be easily modified to suit your needs.
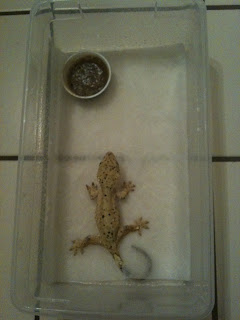
In this case, I'm showing you how to make a 'hydration station' for a Crested Gecko.
Since I'm working with smaller animals, I'm using a plastic shoe box that was given to me by a friend of mine - I've also used plastic tubs designed for storage, which can be used to accommodate larger animals.
As substrate, I've laid down a couple paper towels. Paper towels are an excellent substrate for hydration, as they hold quite a bit of moisture - they are also a great choice for juveniles of many species, as well as injured animals due to their cleanliness, ease of changing, and color (white, simple backgrounds are far easier to spot waste and other important to see items on).
I've misted heavily, and placed a food dish into the shoebox.
Using a paring knife, I poked several holes in the lid.
(Apologies for the angle, but it does show some of the holes better than a straight on view.)

Annnnnd... that's it.
Easy, huh? :)
Now, for a recovering animal, this is a pretty solid set up (add a water dish if they're going to be in there for more than a few hours, even with a heavy mist) - for an animal that just needs to be separated and is going to be in there for a prolonged period of time, use a larger space and add more decorations (paper towel and toilet paper tubes work well for a variety of species). Done and done. Quick, easy, and inexpensive.
In this case, I'm showing you how to make a 'hydration station' for a Crested Gecko.
Since I'm working with smaller animals, I'm using a plastic shoe box that was given to me by a friend of mine - I've also used plastic tubs designed for storage, which can be used to accommodate larger animals.
As substrate, I've laid down a couple paper towels. Paper towels are an excellent substrate for hydration, as they hold quite a bit of moisture - they are also a great choice for juveniles of many species, as well as injured animals due to their cleanliness, ease of changing, and color (white, simple backgrounds are far easier to spot waste and other important to see items on).
I've misted heavily, and placed a food dish into the shoebox.

Using a paring knife, I poked several holes in the lid.
(Apologies for the angle, but it does show some of the holes better than a straight on view.)

Annnnnd... that's it.
Easy, huh? :)
Now, for a recovering animal, this is a pretty solid set up (add a water dish if they're going to be in there for more than a few hours, even with a heavy mist) - for an animal that just needs to be separated and is going to be in there for a prolonged period of time, use a larger space and add more decorations (paper towel and toilet paper tubes work well for a variety of species). Done and done. Quick, easy, and inexpensive.
Sunday, April 17, 2011
A Horse Of Many Colors (aka: Before and After Photos)
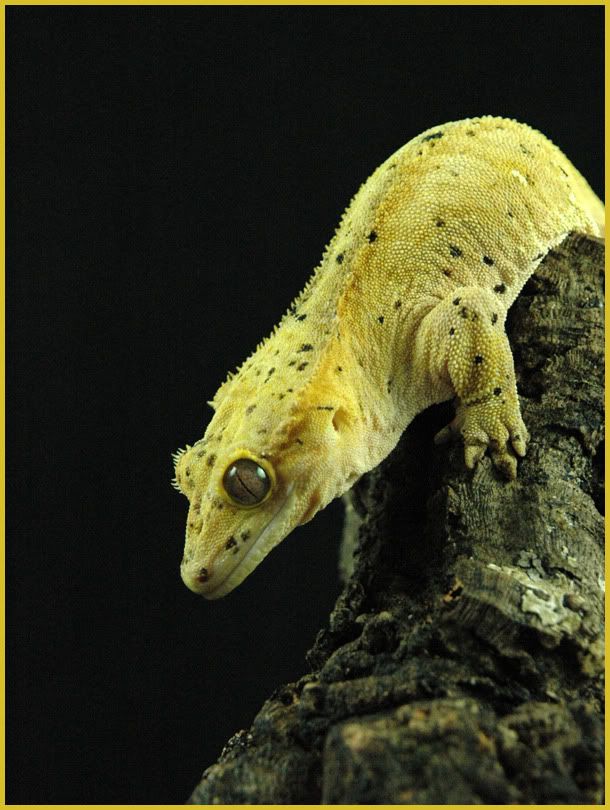
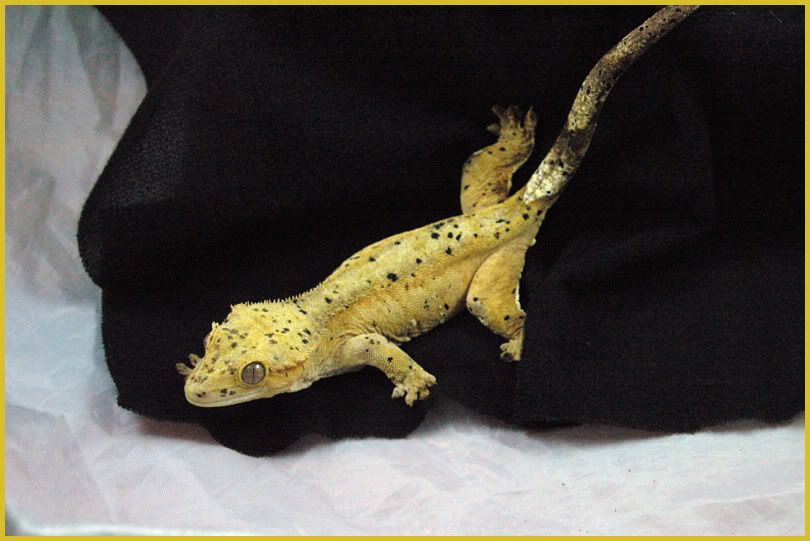
One of the super interesting things about Crested Geckos - to me, anyway - is the amount of change in coloration that they can go through as they mature. I noticed this most dramatically with Norbert as I was looking through old files the other day, and as such, felt like posting a few progression shots.
This is Norbert shortly after I got him, weighing in at 4-5 grams.

This is Norbert as of last week, about three years after the original photo:

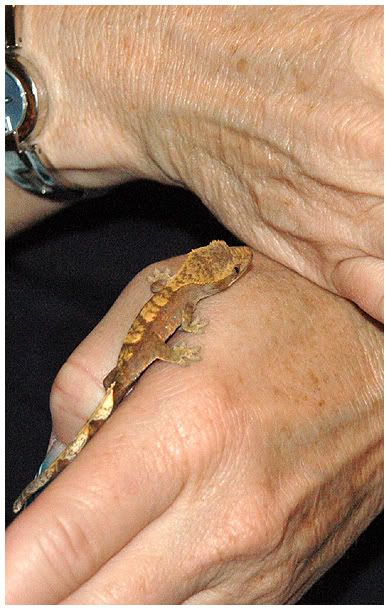
This is a gecko of mine, Zippo, when she weighed approximately 2-3 grams:

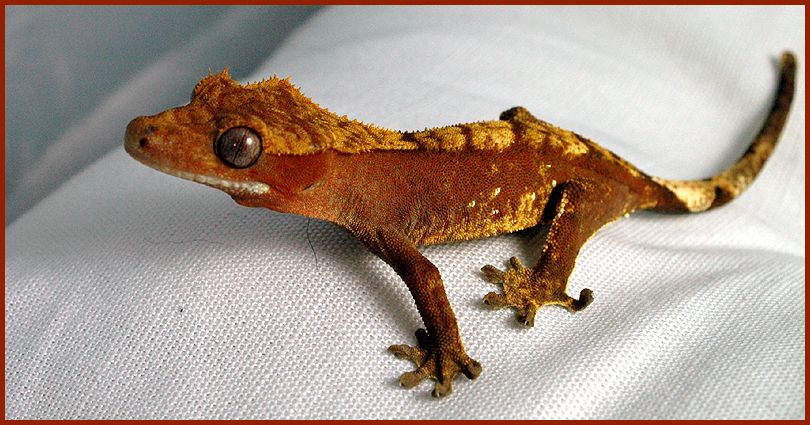
And this is the same gecko when she was approximately a year old (I'd post a photo of her today, but she never fires up so you can see her true colors anymore):

This is Norbert shortly after I got him, weighing in at 4-5 grams.
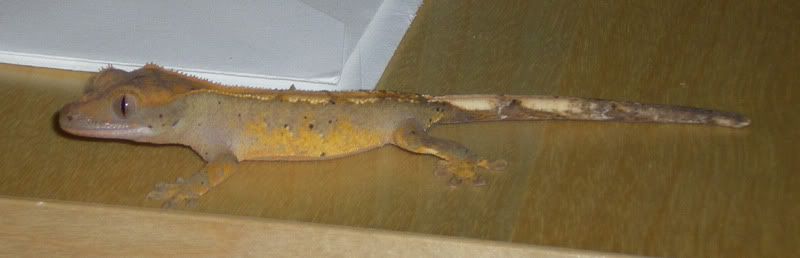
This is Norbert as of last week, about three years after the original photo:

This is a gecko of mine, Zippo, when she weighed approximately 2-3 grams:
And this is the same gecko when she was approximately a year old (I'd post a photo of her today, but she never fires up so you can see her true colors anymore):
Thursday, April 7, 2011
I Get Lizards In The Mail
Norbert's new girlfriend has arrived.
The husband stayed in on Tuesday morning in order to sign off on the package. <3
Without further ado, meet Finch.


The husband stayed in on Tuesday morning in order to sign off on the package. <3
Without further ado, meet Finch.
Saturday, March 26, 2011
DIY - Naturalistic Background, No 'Great Stuff' Needed!
I'd be amazed if no one had thought of this before, but I personally haven't seen any threads about it, so here you go! They're quick, easy, and don't require the curing time or mess that great stuff and silicon do.
You will need:
-Your tank
-A pen of sorts for marking (I had a sharpie lying around so I used that)
-Strong scissors/wire cutters
-Hot glue gun&extra glue sticks
-Fake plants (I got mine from Michael's Arts&Crafts - it is important when selecting your plants that you make sure there are no sharp edges or little pieces that they could pull off&hurt themselves.)
-Contact Paper Cork Board (You can find several different brands, available in different places - I don't remember where I got mine, it might have been Orchard Supply Hardware. Here's a link to some that they have on amazon.com: http://www.amazon.com/Tact-04F-C6421-06-18-Inch-4-Feet-Adhesive/dp/B000WEPD6U/ref=sr_1_2?ie=UTF8&s=home-garden&qid=1301162045&sr=8-2
-Optional, Strongly Suggested: A good sense of humor
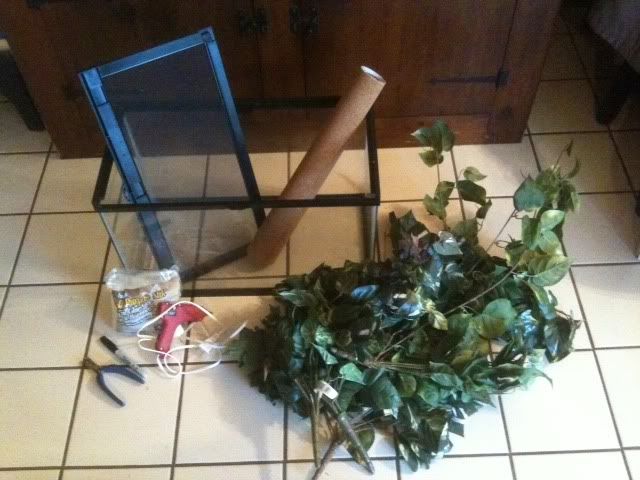
All the supplies, put together (oooh... ahhh... a visual aid...):

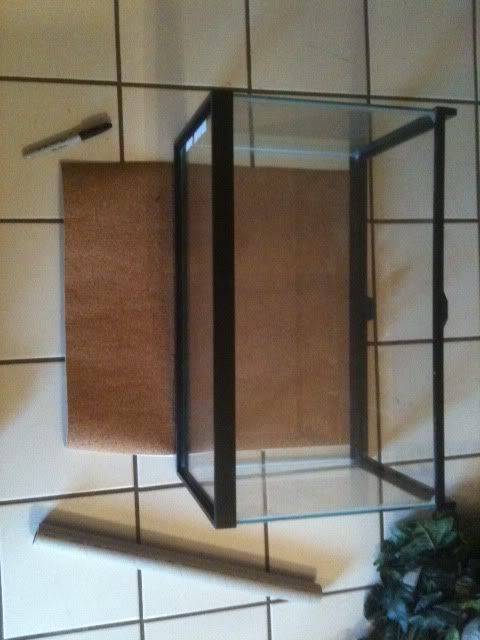
Pick the side that you want to decorate, and measure it out on the cork board. I'm working with scraps that I had left over, and managed to have just enough to cover that back wall of a 10 gal that I wanted to decorate. Draw your lines, then cut.
Personal recommendation: I like to cut the cork a little bit smaller than the dimensions of the side I'm putting it on, so that I know it will fit, and it gives me a little leeway with the plants and letting them stick over the edges. (For example, if the side was 18x24, I might cut the cork at 16x22)
Measure, draw, cut:

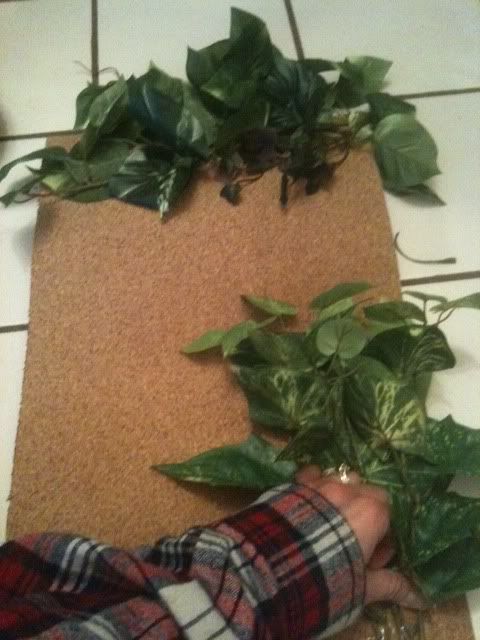
Plug in that hot glue gun, grab your fake plants, and start decorating!

A couple 'rule of thumbs' that I like to keep in mind:
-With my geckos, "If it's not nailed down, they're going to tear it up." My critters /love/ these backgrounds, and it shows.
-Fabric is easier to glue than plastic. I always make sure to anchor the plants down by the 'stem', and then additionally by gluing a couple of the leaves to the cork as well.
-When in doubt, add more glue. It doesn't always have to be to the cork board - sometimes I'll glue one leaf to another well anchored leaf.
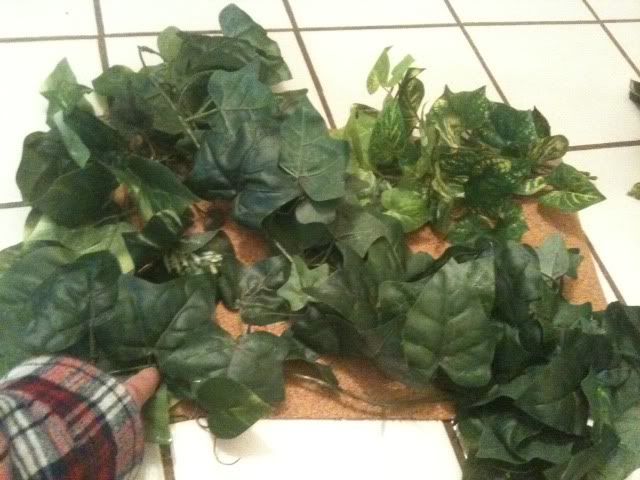
I like to rotate it a little, make sure I get a different view as I'm gluing stuff down, and 'over fill' the background a little - that's my own personal preference.

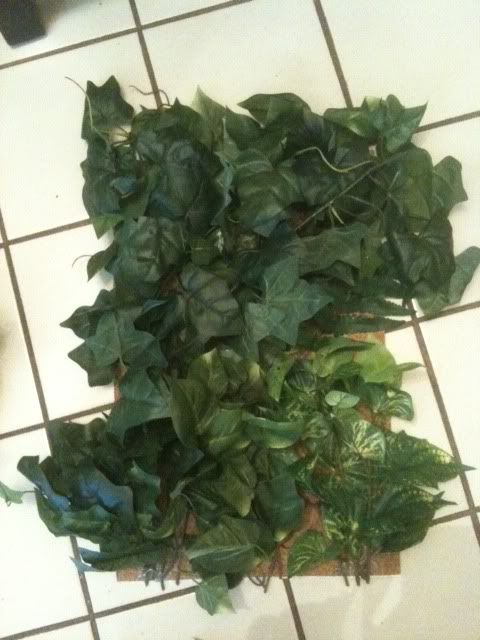
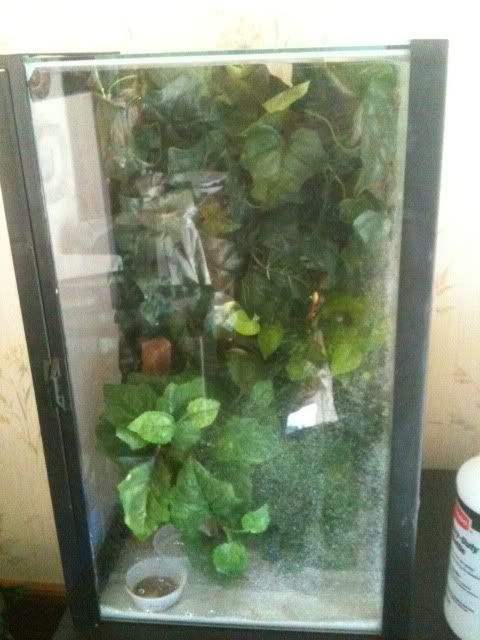
When I think the background looks full enough, or I'm done burning my fingers on the glue gun (which, for a ten gallon, takes about an hour), it looks something like this:

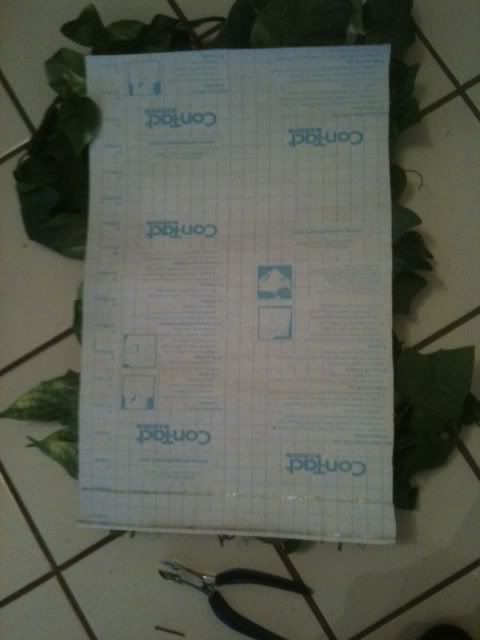
Turn it over, peel off the paper...

And press it onto the inside of the tank. Make sure to be very thorough, so that it adheres fully - I like to start from the center and work out, which helps to eliminate any air bubbles that might have gotten caught between the paper and the backing.

They're quick, easy, and hold up well to both the geckos and the humidity.
Hope this is helpful! :D
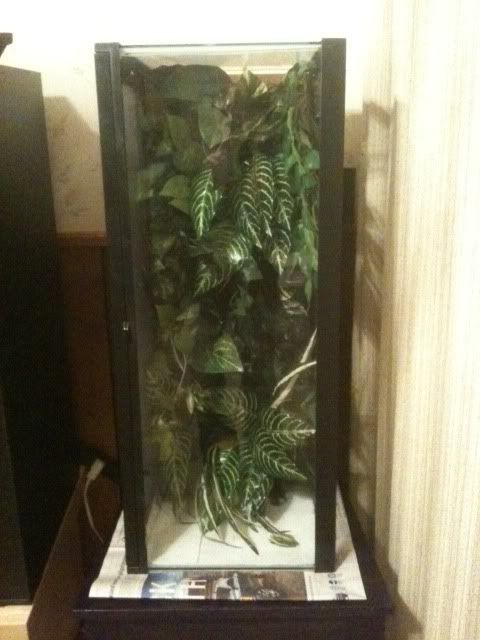
A gratuitous shot of the 20 L I did about 4 months ago:

You will need:
-Your tank
-A pen of sorts for marking (I had a sharpie lying around so I used that)
-Strong scissors/wire cutters
-Hot glue gun&extra glue sticks
-Fake plants (I got mine from Michael's Arts&Crafts - it is important when selecting your plants that you make sure there are no sharp edges or little pieces that they could pull off&hurt themselves.)
-Contact Paper Cork Board (You can find several different brands, available in different places - I don't remember where I got mine, it might have been Orchard Supply Hardware. Here's a link to some that they have on amazon.com: http://www.amazon.com/Tact-04F-C6421-06-18-Inch-4-Feet-Adhesive/dp/B000WEPD6U/ref=sr_1_2?ie=UTF8&s=home-garden&qid=1301162045&sr=8-2
-Optional, Strongly Suggested: A good sense of humor
All the supplies, put together (oooh... ahhh... a visual aid...):
Pick the side that you want to decorate, and measure it out on the cork board. I'm working with scraps that I had left over, and managed to have just enough to cover that back wall of a 10 gal that I wanted to decorate. Draw your lines, then cut.
Personal recommendation: I like to cut the cork a little bit smaller than the dimensions of the side I'm putting it on, so that I know it will fit, and it gives me a little leeway with the plants and letting them stick over the edges. (For example, if the side was 18x24, I might cut the cork at 16x22)
Measure, draw, cut:
Plug in that hot glue gun, grab your fake plants, and start decorating!
A couple 'rule of thumbs' that I like to keep in mind:
-With my geckos, "If it's not nailed down, they're going to tear it up." My critters /love/ these backgrounds, and it shows.
-Fabric is easier to glue than plastic. I always make sure to anchor the plants down by the 'stem', and then additionally by gluing a couple of the leaves to the cork as well.
-When in doubt, add more glue. It doesn't always have to be to the cork board - sometimes I'll glue one leaf to another well anchored leaf.
I like to rotate it a little, make sure I get a different view as I'm gluing stuff down, and 'over fill' the background a little - that's my own personal preference.
When I think the background looks full enough, or I'm done burning my fingers on the glue gun (which, for a ten gallon, takes about an hour), it looks something like this:
Turn it over, peel off the paper...
And press it onto the inside of the tank. Make sure to be very thorough, so that it adheres fully - I like to start from the center and work out, which helps to eliminate any air bubbles that might have gotten caught between the paper and the backing.
They're quick, easy, and hold up well to both the geckos and the humidity.
Hope this is helpful! :D
A gratuitous shot of the 20 L I did about 4 months ago:
Subscribe to:
Posts (Atom)